
Analysis
Creating a Drawbot with ARM Cortex-M3 EFM32
A Drawbot is a robot that can draw pictures using a pen, much like a plotter or a printer. However, there are subtle differences. Unlike a regular printer or plotter, speed is not important. Part of the fun is watching a picture get drawn very slowly over the course of a day, or even a week! The Drawbot is not only an art drawing machine; it can be a part of the art itself, by being mounted on a wall.
PThe project is originally inspired by norwegiancreations and the basic construction is very simple: you have two strings, and each is attached to a stepper motor. Typically, these stepper motors are situated at the top corners of the board. These strings are then connected to a small gizmo that hangs freely down from the strings. This gizmo also holds the pen. By adjusting the length of the strings you can reposition the pen. Finally, we added a small servo that enables us to lift the pen from the paper.
The frame was built using wood, which is a sturdy material and quite useful for our purposes. However, the surface was a bit uneven, which actually impacted the quality of the drawings. When the frame was finished we mounted the two servos in each corner and attached a small reel that we got from a sewing store. This reel was used for adjusting the lengths. The biggest problem was mounting the reels in such a way that each step on the stepper motor would produce the same difference in string length. If the reels were mounted wrong on the axis, it would produce big differences in the drawings.
To further increase precision we added small hooks that we looped each string through. This made it easy to calculate the position of the pen. Finally, the pen holder is basically a hack – it’s a simple construction where the main goal was to hold the pen in place and at the same time provide a bit of weight so that the pen would be positioned correctly. Finally, the servo that pushes the pen in and out from the paper was added, simply by gluing it to the base of the pen holder.

For the controls we used a Giant Gecko Development kit. The Giant Gecko was chosen because of the large flash capacity, which would allow us to add the pictures we wanted to draw into the flash, instead of accessing external flash for the pictures. The Development Kit is the perfect platform for this project, as it has a large set of useful peripherals that we can use in this project, such as:
-USB interface: can be used to upload images or monitor status.
-Ethernet interface: same as above.
-SD Card: can be used to store images.
-External SRAM: can support very large images if decoded into the external SRAM.
-TFT display: we are using this to display diagnostic messages.
-Prototyping board: Very useful for adding our custom circuits, such as the motor drivers!
-Buttons and joystick for controlling the firmware application.
We needed a custom PCB which we added to the prototyping area. This PCB takes care of the stepper motor control and controls the servo. The controls for the steppers are fairly simple, one pin is used for direction and the other generates a step whenever it is toggled. We also use the DAC on the EFM32 to generate a reference voltage for each stepper motor driver, which controls how much current is driven into the coils of the stepper motors. This allows us to calibrate them to just the right amount of current, to prevent heating up or excessive motor noise. To control the servo we used one of the EFM32’s built-in timers to generate pulses every 20 ms.

To give an idea of the accuracy of the drawbot, consider the number steps per rotation of each stepper motor. Each full step of the motor is 1.8° (360°/200), but using a driver with microstepping, this is further reduced by a factor of 2, 4 or 8. With 8 microsteps per step, each step then becomes 0.225°. With a reel diameter if 26.4 mm, each microstep of the motor moves the pen by only about 0.05 mm! Because the stepper motors’ position is always defined as an exact number of steps, we can always return to an absolute location within this accuracy, making extremely accurate drawings possible.
We experimented a lot with different algorithms for drawing – our earliest attempts were simple vector drawings that drew a simple cube. This allowed us to calibrate the machine and improve the precision and our algorithms. Then we made a simple dithering version where we would move the pen through all possible positions in a given rectangle. We would then map the physical position of the pen to the pixels of a given picture. If there was a black pixel, we would set the pen to paper, if it was black, we would lift it.
The next algorithm was a vector based machine. We used SVGs for this. Vector graphics and a drawbot is a perfect match. Our first picture was a gecko and it turned out beautifully! Finally, the last algorithm holds one string constant while it drags the other string. If the physical location of the pen maps to a dark pixel, we move the pen up and down to shade that area. The working process and the result can be seen in the video below!
Materials used:
-Wooden frame.
-Two stepper motors.
-Giant Gecko Development Kit.
-Custom stepper motor driver board.
-Small and cheap power supply.
-Some string.
-Pen and paper.
Product Spotlight
APV1111GVY
Panasonic
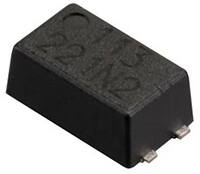
Panasonic PhotoMOS® Photovoltaic MOSFET High-Power Drivers
| SKU: | |
|---|---|
| Stock: | 3490 |
| Cost: | $3.95 |
Upcoming Events
8th August 2024
China 1st and 2nd Floor, Area A, China Import and Export Fair Complex